


1. 코드 리뷰
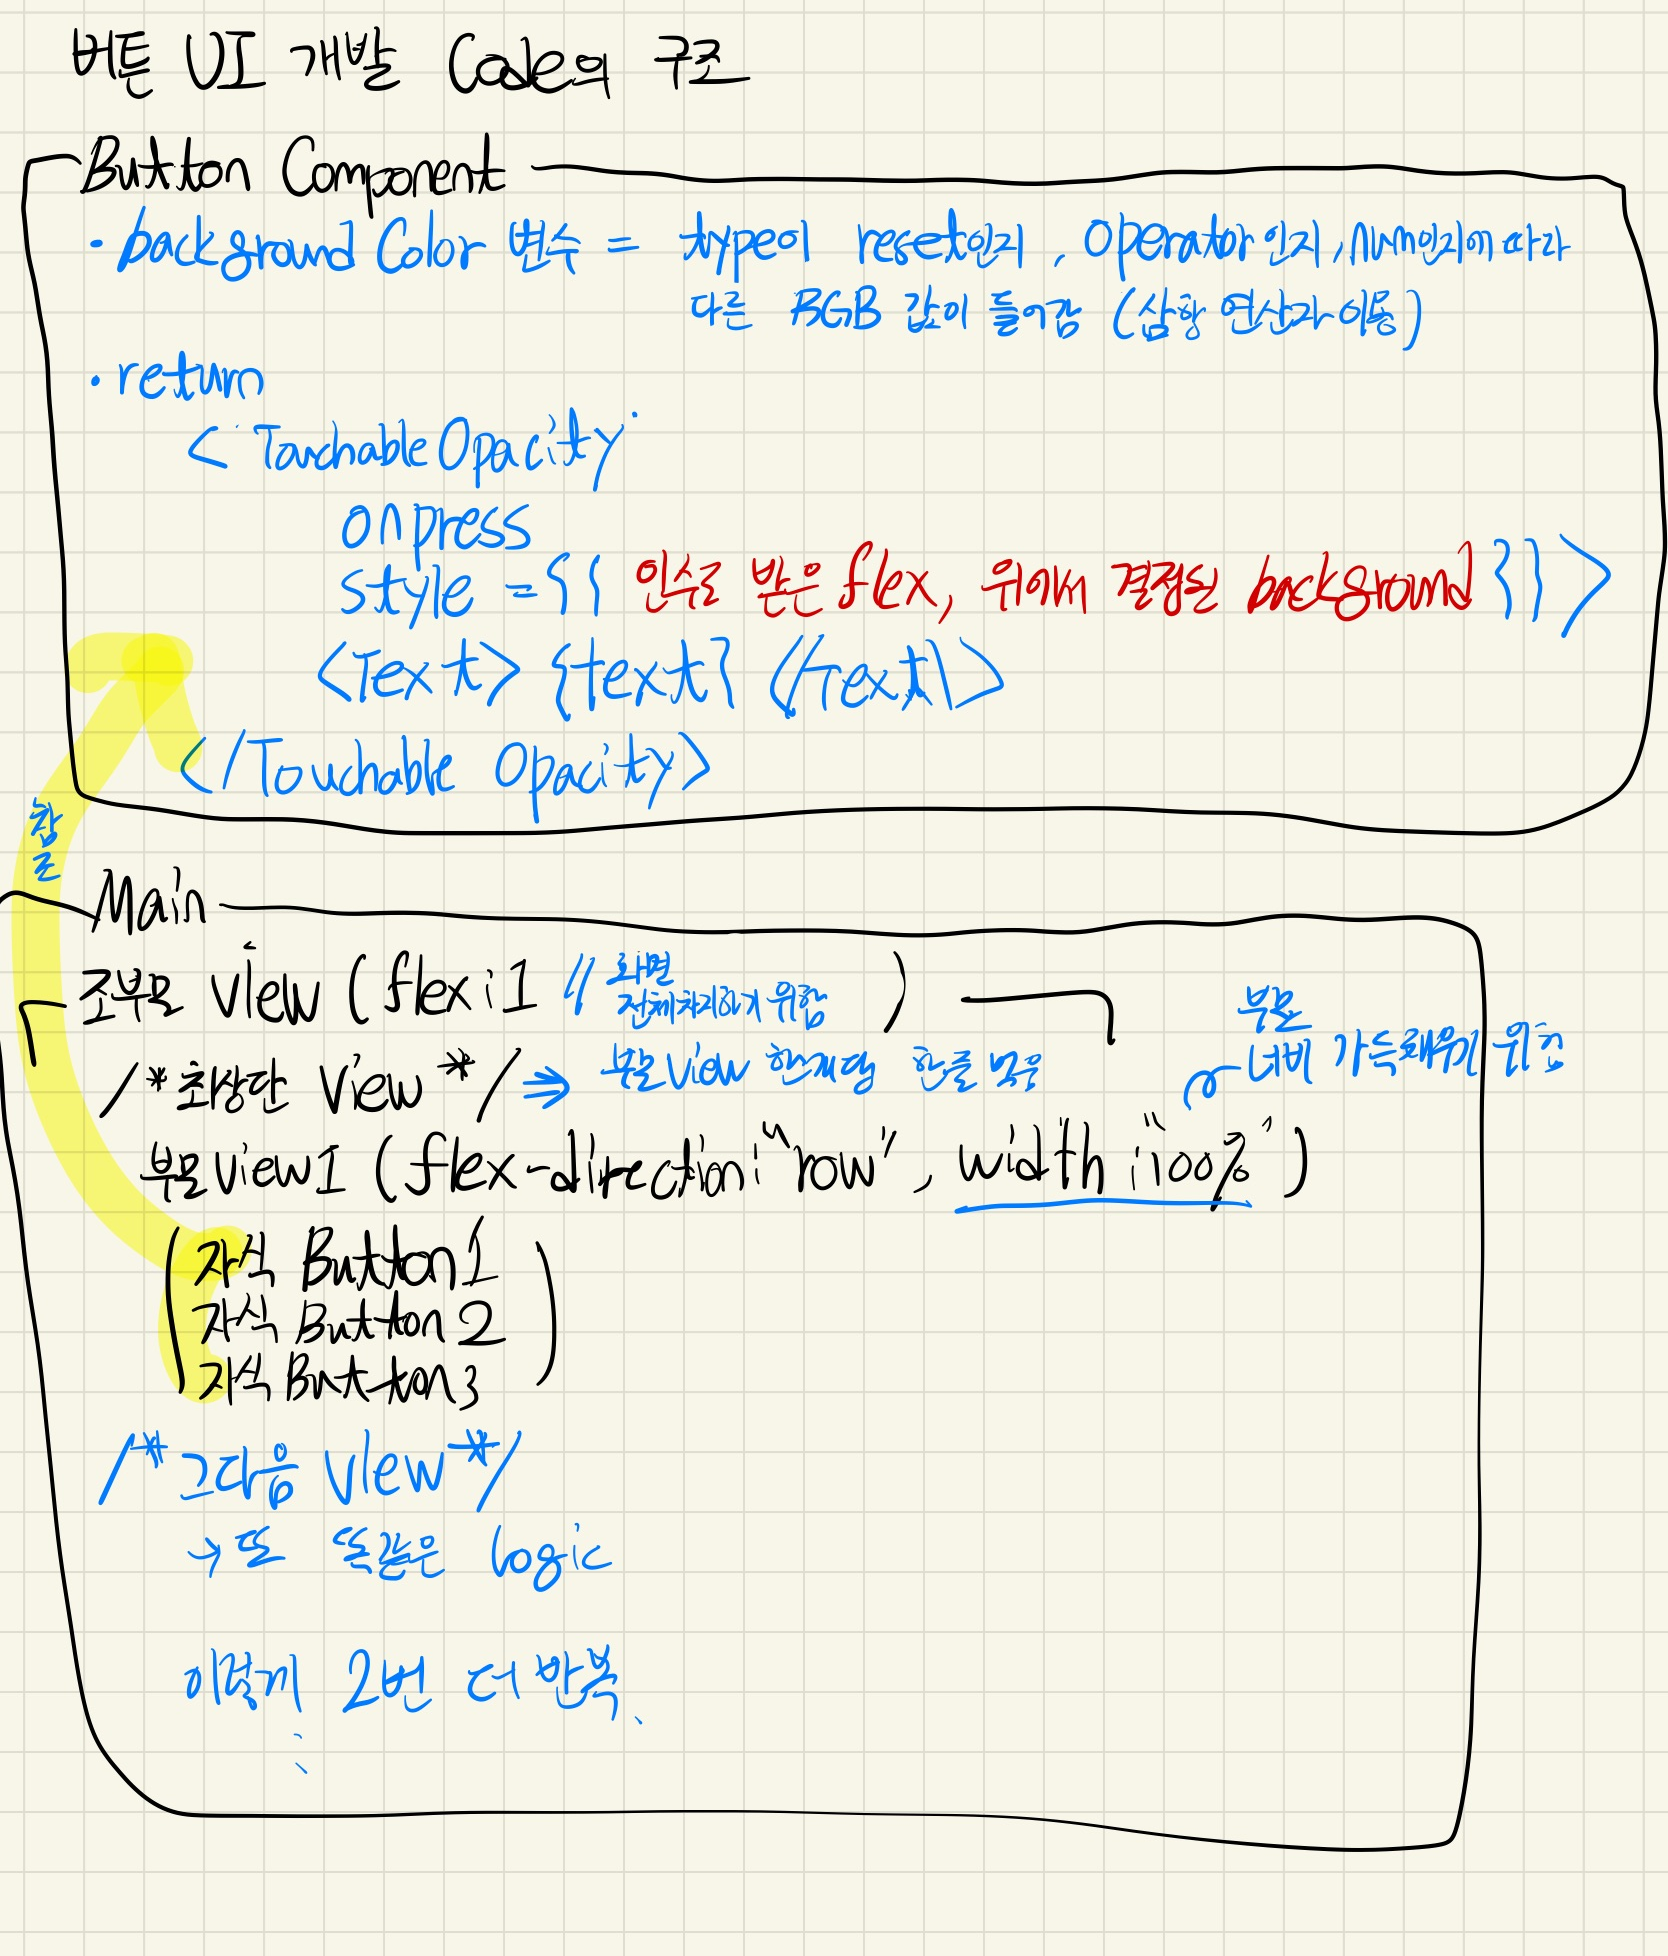
import React from "react"
import { TouchableOpacity, View, Text } from "react-native"
import styled from "styled-components/native"
const ButtonContainer =styled.View`
flex-direction: row;
width: 100%;
`;
//Button Type : 'reset' | 'Operator' | 'num'
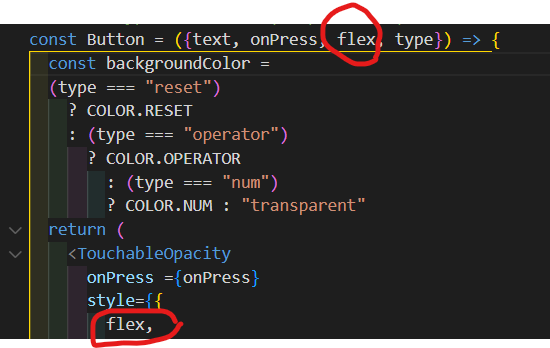
const Button = ({text, onPress, flex, type}) => {
const backgroundColor =
(type === "reset")
? COLOR.RESET
: (type === "operator")
? COLOR.OPERATOR
: (type === "num")
? COLOR.NUM : "transparent"
return (
<TouchableOpacity
onPress ={onPress}
style={{
flex,
backgroundColor,
justifyContent: "center",
alignItems: "center",
height: 50,
borderWidth: 0.5,
borderColor: "black",
}}>
<Text style={{color: "white", fontSize: 15}}>{text}</Text>
</TouchableOpacity>
)
}
const COLOR = {
RESULT : '#4e4c51',
RESET : '#5f5e62',
OPERATOR : '#f39c29',
NUM : '#5c5674',
}
export default ( ) => {
return(
<View style={{flex: 1, width: 250}}>
{/* 결과 */}
{/* [AC ~ /] */}
<ButtonContainer>
<Button
type = "reset"
text = "AC"
onPress={() => null}
flex={3}
/>
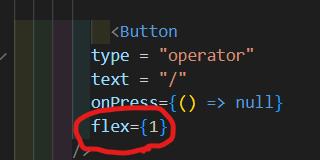
<Button
type = "operator"
text = "/"
onPress={() => null}
flex={1}
/>
</ButtonContainer>
{/* [7 ~ x] */}
<ButtonContainer>
<Button
type = "num"
text = "7"
onPress={() => null}
flex={1}
/>
<Button
type = "num"
text = "8"
onPress={() => null}
flex={1}
/>
<Button
type = "num"
text = "9"
onPress={() => null}
flex={1}
/>
<Button
type = "operator"
text = "x"
onPress={() => null}
flex={1}
/>
</ButtonContainer>
{/* [4 ~ -] */}
<ButtonContainer>
<Button
type = "num"
text = "4"
onPress={() => null}
flex={1}
/>
<Button
type = "num"
text = "5"
onPress={() => null}
flex={1}
/>
<Button
type = "num"
text = "6"
onPress={() => null}
flex={1}
/>
<Button
type = "operator"
text = "-"
onPress={() => null}
flex={1}
/>
</ButtonContainer>
{/* [1 ~ +] */}
<ButtonContainer>
<Button
type = "num"
text = "1"
onPress={() => null}
flex={1}
/>
<Button
type = "num"
text = "2"
onPress={() => null}
flex={1}
/>
<Button
type = "num"
text = "3"
onPress={() => null}
flex={1}
/>
<Button
type = "operator"
text = "+"
onPress={() => null}
flex={1}
/>
</ButtonContainer>
{/* [0 ~ =] */}
<ButtonContainer>
<Button
type = "num"
text = "0"
onPress={() => null}
flex={3}
/>
<Button
type = "operator"
text = "="
onPress={() => null}
flex={1}
/>
</ButtonContainer>
</View>
)
}2. 알게된 점
(1) flex: 1
=> 자신의 고정크기 없이 화면 크기에 맞게 늘어나고 줄어들겠다는 의미
화면을 얼마나 차지할 것인가는 형제 컴포넌트들과의 대결
(2) width: "100%"
=> 부모 너비의 100 퍼센트를 차지하겠다.
(3) CSS 의 값들을 인수로 받는 경우, name : value 형태로 안 써주고 그냥 name만 CSS Style에 써줘도 적용이 된다.
const Button = ({text, onPress, flex, type}) => {
  const backgroundColor =
  (type === "reset")
    ? COLOR.RESET
    : (type === "operator")
      ? COLOR.OPERATOR
        : (type === "num")
        ? COLOR.NUM : "transparent"
  return (
    <TouchableOpacity
      onPress ={onPress}
      style={{
        flex,
        backgroundColor,
        }}>
    </TouchableOpacity>
위의 예시를 보면 굳이 {flex: flex, backgroundColor: backGroundColor}라고 안 써줬다. 태그 속성의 이름을 CSS 문법과 똑같이 해주면 자동으로 들어간다.
** 주의점** CSS의 속성 이름과 태그의 속성 이름을 똑같이 해줘야 한다!
3. 스스로 해보기
0


